Saturday, December 05, 2020

,
Links I Love | On The Creek Blog

Links I Love | November 2020!

I'm back with a new link love post!

It's been a long time since I've done one of these posts!

I recently went through my links & found a bunch of great ones that I had to share!


Monday, November 30, 2020

,
Small distance/virtual learning space in a coat nook | On The Creek Blog

Our virtual learning set up in a small space!

After a good start, our school ended up on virtual learning starting this week.

Because our house has a serious lack of space, I was originally going to have our foster kiddo just do his work at the kitchen table.  I didn't think our house had the storage for a dedicated space...until I made one!

Because of our virtual learning situation, our kiddo didn't bring home a lot of books.  He does have a few folders full of paperwork he needs, though.  I wanted a space to store everything, including his school laptop.


Friday, October 30, 2020

,
pumpkin carving | On The Creek Blog

Pumpkin carving 2020!

For the first time in forever, we carved pumpkins for Halloween!

This is the first year we've had a kiddo in our house for Halloween.

He's been super excited about Halloween for weeks!  He's been counting down the days until his class party & actual Halloween.

To celebrate, we carved pumpkins last weekend.  Our kiddo drew out his pumpkin face & my mom carved it out.  He also drew on all sides of another pumpkin & my mom cut all the sides out!  My mom didn't even get a chance to carve her own pumpkin!


Monday, October 26, 2020

,
pumpkins grown in our garden | On The Creek Blog // www.onthecreekblog.com


Here are some of the pumpkins we grew this year!

We grew a lot a pumpkins this year!

Last year we bought pumpkin plants & only ended up with 3 pumpkins!  This year, we decided to start from seeds & hope for the best.

We sowed the seeds directly in the ground around Memorial Day.  We chose pumpkin seeds of various varieties.

We did all orange pumpkins this year.  Next year I'd like to try growing pumpkins of different colors.  We kept it simple this year because we didn't know how they would grow.


Monday, October 12, 2020

,
Home canning | On The Creek Blog

2020 garden harvest!

We had quite the garden harvest this year!

I can't tell you how many days & nights we spent harvesting & canning all the things!

I started out by freezing some sauces until I quickly found out we had more sauce than freezer space!

As you know, I'm not the biggest fan of canning.  I learned to tolerate it this year only because I knew I was making some great sauces!


Tuesday, September 15, 2020

,
Garden update for August 2020 | On The Creek Blog

Garden update for August 2020!

When I was going through my pictures from August, I found out I only took pictures of the tomatoes!  I'll give you the update on everything else, but I guess you will only see the tomatoes!

The tomatoes really showed up in August!  

I will have to do another post about all the harvesting because it was a lot!  Even though I'm not the biggest fan of canning, we ended up canning quite a bit of pasta sauce & salsa!


Monday, August 24, 2020

,
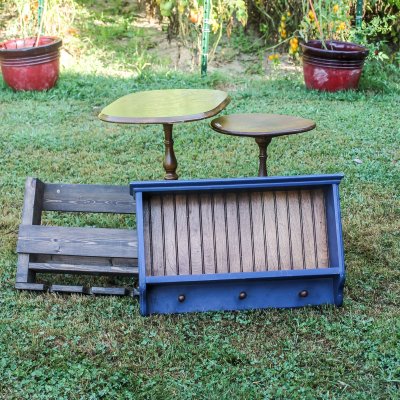
Awesome & Unique Items Found At The Thrift Store | On The Creek Blog

Items found at the thrift store over the weekend!

We did a little thrift shopping over the weekend & I picked up a few cute things!

I've been a little more picky with what I buy lately.  I have worked on enough projects to have a decent idea of things I want to get into & what to leave alone.  Of course, every project is different & there are always surprises!  Something that seems simple might end up being quite time consuming!

Here's my latest thrift haul!


Monday, August 17, 2020

,
Making & Canning Pickles | On The Creek Blog

Pickle making adventures!

Our garden has been producing tons of cucumbers this year!  I've been pickling all the things!

At first I just used premixed packets for my pickling.  I made sweet relish & kosher dills that way.

Then I found this recipe for refrigerator pickles.  At the time, I had enough cucumbers for just 2 jars, so I decided to try it out.  I modified the recipe just a little by adding garlic salt along with fresh garlic.  I also added dried dill along with the fresh dill.  I wanted super flavorful pickles!

The pickles did their thing in the refrigerator for almost a week before I cracked them open.  They were absolutely fantastic & so full of flavor!

Tuesday, August 11, 2020

,
Garden update for July 2020 | On The Creek Blog

Garden update for July 2020!

The garden was thriving during July!

Tons & tons of tomatoes are starting to take shape!

Because the tomato plants began super tiny, I wasn't sure what harvest time would look like.  Well now I know...harvest time is going to look awesome!

There are so many tomatoes coming on right now.  They should be ready for harvest very soon.  Then the busy time will begin--processing all the tomatoes.  I'm thinking tons of pasta sauces!  Because I'm not a huge fan of canning, I'll most likely be freezing the tomatoes.  It looks like we'll have to buy another freezer because the garden is so plentiful!

Wednesday, July 22, 2020

,
A Farmhouse style end table makeover | On The Creek Blog

An ordinary end table gets a farmhouse makeover!

Remember my upcycled dining bench made from an old end table?  Here is what I did with the matching end table!

I was originally going to make a matching bench but I wanted to do a simple project so an end table makeover it was!

This project came together pretty smoothly.  I love when that happens!

Here's how it all went down:


Monday, July 13, 2020

,

building trellis supports for tomato plants | on the creek blog // www.onthecreekblog.com
We built a support system for our tomato plants!

Our tomato plants are off to a fantastic start this year!  They're doing so great that they need a lot of additional support!

We started the season by using some tomato cages we already had & using stakes for the rest.  We quickly outgrew that situation, so we needed to do something more.  Even the tomato cages weren't strong enough to contain these tomatoes!

I saw this homemade tomato trellis on Pinterest & I knew I wanted to do something similar.

My husband, James, & I used posts from Tractor Supply.  For the trellis wire, we used 17 gauge electric fence wire.  We ended up using almost the entire roll of wire for the trellis!  We'll probably add more wire to the top of the posts as the plants grow.

James spent a Saturday morning stringing the trellis together.  We were initially going to put posts on each end of the tomato rows, but we still needed more support, so we added even more posts in the middle.

To create the trellis, James wrapped the wire around to create an area between the plants so they could sit on the wire & be supported.  He did this in a few p so the tomato plants l have support as they grow taller.  He even wrapped the plants with tomato cages around them 

Monday, July 06, 2020

,
Garden update for June 2020 | On The Creek Blog

Here's the garden update for June 2020!

The garden is off to a great start this year!

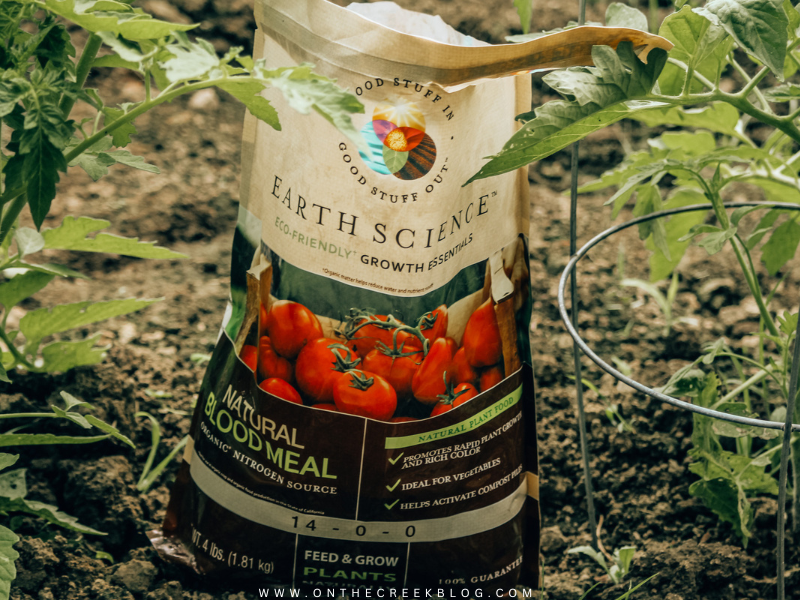
We planted the garden over Memorial Day weekend this year.  When we planted, the tomatoes were super tiny & I was afraid they weren't going to make it.  A few weeks in, I added the natural blood meal to the plants.  Then they really started to take off!

Our tomato plants are now huge!  They're the biggest tomato plants we've ever grown & it's only a little into July!


Monday, June 29, 2020

,
using natural blood meal on tomato plants | on the creek blog // www.onthecreekblog.com

I've never really been interested in using plant food in the garden. I always thought of it as the easy way out.


That also could explain why my gardens haven't done their best in the past!


Sometimes you need a little help & I got it unexpectedly this year. One day, our neighbor brought over a bag of plant food. He used it in his garden in the past & suggested we use it in ours.


Natural Blood Meal is an organic fertilizer made from dried animal blood. It is rich in nitrogen, an essential nutrient for plant growth. When added to soil, natural blood meal slowly releases nitrogen, providing a sustained source of plant nutrition. It also helps improve soil structure, water retention, and overall plant health. 


Up until this point, our tomatoes were struggling. We had started them from seeds super late & they were still small when we put them in the garden.


Once the tomatoes were in the garden, we had quite a few that were starting to struggle. Instead of growing, they began to look like they would die. We even replaced a few plants that did end up dying.


So when our neighbor brought over the plant food, I was ready to try anything.


using natural blood meal on tomato plants | on the creek blog // www.onthecreekblog.com


using natural blood meal on tomato plants | on the creek blog // www.onthecreekblog.com


using natural blood meal on tomato plants | on the creek blog // www.onthecreekblog.com


I placed a small spoonful of the Natural Blood Meal around each tomato plant. Since it was hot outside that day, I waited until the evening to water everything.


Then I started seeing results. I wish I had before & after pictures because the results were excellent! It's been about 3 or 4 weeks since I applied the plant food & the tomatoes have grown so fast!


using natural blood meal on tomato plants | on the creek blog // www.onthecreekblog.com


using natural blood meal on tomato plants | on the creek blog // www.onthecreekblog.com


I've never had tomato plants this big, let alone this early in the growing season! I think it's a combination of planting in actual soil & adding Natural Blood Meal to the plants. Whatever it is, the tomatoes are doing great!


using natural blood meal on tomato plants | on the creek blog // www.onthecreekblog.com


using natural blood meal on tomato plants | on the creek blog // www.onthecreekblog.com


I love it when the garden does well & this year is off to a fantastic start! I hope it continues in the right direction!


using natural blood meal on tomato plants | on the creek blog // www.onthecreekblog.com


using natural blood meal on tomato plants | on the creek blog // www.onthecreekblog.com


Shop this post! As an Amazon Associate, I earn from qualifying purchases.


Thursday, June 25, 2020

,
Our roses are in full bloom!

The climbing roses we planted last year are starting to bloom this year!

As I mentioned in my spring yard walk post, a couple of the rose bushes we planted last year died.  I'm happy that these climbing roses made it!

I wanted to put some rose plant food on them but I never got around to it this year.  Luckily, they seem to be doing well.

I never saw myself as someone who has a lot of flowers & a huge garden, but here I am!


Wednesday, June 24, 2020

,
Remembering our sweet dog.

Our sweet boy, Rain, passed away last week.

He was 16 years old.

It's been so difficult without him here.  I miss him so much.

He was the best dog we've ever had.

Since he was an older dog, I tried to prepare myself for his passing.  I was still a total mess.  No amount of thoughts beforehand could prepare me for his loss.

He would have made such an amazing big 'brother' to our foster children.


I hope we'll be able to meet again someday, sweet boy.


Monday, June 15, 2020

,
A solar powered chandelier for the pergola!

When we built the pergola a couple months ago, I knew I wanted to add a chandelier.

It took a while to find a chandelier but I finally found one over the weekend at a yard sale.

It was also super cheap which is a win every time!

I wanted to give it just a little makeover before I put it outside.  I wanted to keep the rustic look, so I did very little in the makeover department.


Friday, June 12, 2020

,

'Fresh Cut Flowers' handmade sign with Cricut | On The Creek Blog // www.onthecreekblog.com
A vintage inspired 'Fresh Cut Flowers'  sign.

I'm back with another sign!

After seeing how easy it was to create my 'Tomatoes' sign, I wanted to make another sign!

I took a slightly different approach with this sign.

I originally wanted to make another sign that looked like the 'tomatoes' sign but I didn't have any more of the old boards.

What I did have was a piece of thick pine board, so I decided to use that.  Because I wanted a square sign, I had my husband cut it down to size.

Once the board was cut, it was time to create the sign!


Thursday, June 04, 2020

,
vintage inspired DIY tomatoes sign | On The Creek Blog // www.onthecreekblog.com
A vintage inspired 'tomatoes' produce sign.

After planting so many tomatoes this year, I felt like I needed a sign to go with them!

I saw some vintage produce signs & wanted to make my own!

Sign making is something I want to start doing more.  It's a huge learning curve for me, though!  Because I have no artistic skills whatsoever, I can't just paint the lettering on!  I have to use a cutting machine to cut the letters out for me!

I bought a Cricut a few years ago & have used it maybe a handful of times.  The Cricut is also another huge learning experience!  I really need to just sit down & read the million tutorials there are on it!  So far, I've only used i
t to create basic things, like this sign! 


Wednesday, June 03, 2020

,
Here's what we planted in the garden this year!

We planted a lot this year in the garden & I wanted to make a post to document everything!

We didn't intend on having a big garden this year but it just worked out that way!  Our old tomato seeds did really well & we ended up with a lot of tomato plants!

The old seeds took a while to grow, so thinking nothing was happening, I went & bought more tomato seeds.  Then everything started growing all at once!  I did notice that the new seeds matured a lot faster than the older seeds, but everything seems to be doing alright.


Tuesday, June 02, 2020

,
Planting tomatoes in the garden | On The Creek Blog

Planting the 2020 garden!

We went big with this year's garden!

After the success of our tomato seedlings, we ended up with our largest garden to date!

This year, we planted a little bit of everything.  Because we planted so many things, I'm working on another post that lists everything.

The only plants we bought this year for the garden were the pepper plants.  Everything else we started from seeds.

We've never started this may veggies from seeds before, so I'm excited to see how they'll turn out!


Monday, June 01, 2020

,
We built a Little Free Library®!

Having a Little Free Library has been a dream of mine & it finally came true!

We actually completed this project in January but it took a while to get this little library in our yard!

Since we have harsh winters in our area, I wanted to wait until spring before we brought the library outside.

Then the COVID-19 pandemic hit & I was unsure if it would be the right time to open.

Finally, I decided to open (with precautions) a few weekends ago!

I love Little Free Libraries & I think they're just the cutest!  

Thursday, May 21, 2020

,
A chair planter makeover!

Can you believe I got this chair planter out of the burn pile?!

Of course, it didn't look so great when I got it.

The thing about chair planters is that they're exposed to the elements, so they fall apart rather quickly.  

I've had to repair a couple chair planters this year after a windy day sent them across the yard at a rapid pace!

As for this chair planter, I got it from my mom.  She had several chairs that had seen better days, so to the burn pile they went.  

I saw some potential in this planter chair, so I dug it out of the pile & got to work on restoring it!

Wednesday, May 20, 2020

,

Image of homemade banana bread loaves fresh from the oven, showcasing a golden-brown crust and a moist, fluffy texture, set against the cozy backdrop of Tiff's kitchen. | on the creek blog // www.onthecreekblog.com

Hey Besties! 🌟 Guess what? I've stumbled upon the holy grail of banana bread recipes, and I've been obsessed for months! 🍞✨


A few days back, I found myself with a bunch of super-ripe bananas (you know, the perfect banana bread kind!). So, what did I do? I whipped up not one but several loaves of this heavenly bread!

Here's a funny twist: the original recipe was just a screenshot on my tablet, with no website or author's name. Wanting to give a shout-out to the genius behind this yumminess, I turned into a detective on Google. 🕵️‍♀️ Believe me, finding this needle in the haystack of a million banana bread recipes was no small feat!


I'm such a repeat offender with this recipe that I finally wrote it down. No more squinting at a flour-smudged tablet screen for me! 📱💁‍♀️

Image of homemade banana bread loaves fresh from the oven, showcasing a golden-brown crust and a moist, fluffy texture, set against the cozy backdrop of Tiff's kitchen. | on the creek blog // www.onthecreekblog.com


The other day, I decided to double the recipe while in my baking frenzy. Picture this: my KitchenAid mixer practically doing acrobatics to mix all those bananas! 🍌🎪 A word of advice? Stick to single batches, folks!


I usually jazz up my banana bread with walnuts and chocolate chips. But, surprise! I was out of walnuts and didn't dare overload my already overworked mixer. So, I went old school and baked it plain. And guess what? It was a smash hit, even without the frills! 🎉


I made so much I thought I'd freeze some for later. Who was I kidding? In our house, banana bread vanishes faster than a magician's rabbit! 🐰✨ It's just that delicious!

Image of homemade banana bread loaves fresh from the oven, showcasing a golden-brown crust and a moist, fluffy texture, set against the cozy backdrop of Tiff's kitchen. | on the creek blog // www.onthecreekblog.com


Want in on this banana bread magic? Head over to the blog for the recipe! It's a game-changer! 🍌🌟

[Link to the recipe]


Shop this post! As an Amazon Associate I earn from qualifying purchases.

Tuesday, May 19, 2020

,
Transplanting small, leggy tomaotes into larger containers | On The Creek Blog
Transplanting tomatoes into larger cups!

Over the weekend, we transplanted our tomatoes into cups!

As I said in my seedling update post, my tomatoes were getting super leggy. They needed transplanted ASAP!  I wasn't quite ready to put them in the garden just yet, so we transplanted them into bigger containers.

This proved to be an enormous task!

My husband & I worked for HOURS getting these little tomatoes transplanted! 

It was quite the task but I'm so happy with the results!


Monday, May 18, 2020

,
Planting Roma VF Seedlings | On The Creek Blog
Starting Roma VF tomatoes from seeds!

I was going through my pictures for another post & I realized I never told you about our Roma VF seed starting!

We planted our old seeds on April 15th & a week later, nothing was happening.

I figured our seeds weren't going to produce anything of value, so I wanted a back up plan. But, as I posted last week, those seeds ended up sprouting!  They were just super late coming.

While we were at Home Depot getting a few supplies for our pergola, I browsed the seed area.  I'm a huge fan of Roma tomatoes & I came across the Roma VF variety.  I decided to give it a try!

When I was planting these Roma tomatoes, I decided to do something a little different.  I planted them in cups!

Friday, May 15, 2020

,
White lilac // spring yard walk | On The Creek Blog
Come with me as I look over the various plants in our yard & see how they're doing after the winter!

It's time for my annual spring yard walk!

Come along with me as we tour my yard & see how the perennial plants are doing this spring!

This spring has been weird.  There were a couple late frosts & overall, everything was super late coming over here.

I've said this in my last yard walk, but I'm certain everything comes up just a little bit slower over here.  My lilacs haven't even flowered yet!

Here are the plants & how they're doing this year:


Thursday, May 14, 2020

,
Leggy tomato seedlings | On The Creek Blog
An update on our seedling adventure!

I'm back with a seedling update!

Our various tomato seedlings have been growing for about a month now.

Most of the old seeds we planted actually came up!  I was so excited to see the different varieties coming up!  Some varieties definitely did better than others, but everything produced at least a few seedlings!

But, here's the bad news...

The tomato seedlings are super leggy!


Wednesday, May 13, 2020

,
gardentitleBreaking ground in our new garden area!

We tilled our new garden area last week!

But, first, a little garden backstory:

For the past 2 years, we’ve used our railroad tie raised garden bed.

That raised bed was kind of a garden disaster. 

We put plastic in the bottom as a weed barrier & I’m almost certain it fried our plants the first year. 

Last year was more promising, but I don’t think the soil was quite right.  The plants did better, but they were nothing compared to the very first year we had a garden.

This year, I decided to go back to the basics.

Tuesday, May 12, 2020

,
breadtitleI made the famous Reddit Peanut Butter Bread!

I enjoy browsing Reddit & love finding new subreddits to look through.

One of my latest finds has been the Old_Recipes subreddit.

When I first started looking at the subreddit, I kept seeing the same recipe made by different users over & over:

Peanut Butter Bread.

It looked easy enough to make so I thought I’d try it.

Here are my thoughts:


Monday, May 11, 2020

,
A free primitive table gets a cute & updated makeover! | On The Creek BlogA primitive table gets a cute & updated makeover!

We completed this project last year, but I’m just getting around to posting it today!

I actually gave this table a little refresh over the weekend which inspired me to share it!

The table is far from perfect, but I love the primitive vibes it has!

I’m all about trash to treasure makeovers & this table is a true reflection of that!

Can you believe we picked this table up for free in front of someone’s house?!  We were driving by & saw this falling apart table with a ‘free’ sign next to it & immediately turned around to take a look!

The table was in rough shape, but it was free so I wasn’t afraid to take a chance on it.


Friday, May 08, 2020

,
peartitleBeautiful to pear blossoms!

I’ve shared some pictures of my parents’ pear tree in the past.  I thought I’d take you along this year from the beginning:  the blossoms!

The pear tree always does extremely well & produces a ton of pears, but it has really shown up this year!

There are blossoms everywhere!

This is a Bartlett pear tree & full pears should be ready by the end of August or early September.

When it’s harvest time, there will be plenty of pears to eat & make things from!  I’ve gathered some recipes that would be perfect for these Bartlett pears!


Tuesday, May 05, 2020

,
Building a small DIY pergola | On The Creek Blog
We built a (small) pergola!

This was one of those projects that I’ve been wanting to do forever & it finally happened!

Last year, we acquired some old posts & they just sat outside in the yard, waiting for something to be done with them.  Because of bugs, I didn’t want to bring them into the house, so an outdoor eyesore they became!

One day, I decided that they would make a good pergola.  There was a spot in our yard between our water well & our lilac tree that I thought would be perfect for a pergola.  I also hated mowing that tiny area so I wanted to get rid of it!

Finally, after months & months of wanting to build it, we finally did it! 

Monday, May 04, 2020

,
Step-by-step transformation of an upcycled dining bench, showcasing the process from applying crackle glaze to the final custom-stained piece. | on the creek blog // www.onthecreekblog.com

Hey, Besties! 

Guess what? I'm back with a fab update on our DIY upcycled dining bench

The Bench's First Fitting 

Before diving into the paint pots, we took the bench upstairs for a little fitting session with our dining table. Oops! The legs were sky-high! A quick trim and some sanding later, they were runway ready.
Step-by-step transformation of an upcycled dining bench, showcasing the process from applying crackle glaze to the final custom-stained piece. | on the creek blog // www.onthecreekblog.com

The Color Palette 

Inspired by Charlotte's post on aging cabinet legs, I gave our bench a vintage vibe. I reached for my go-to Project Perfect paint, which I snagged on clearance. It's the only brown paint I own, but it's a gem! It gave the bench frame a uniform, rich hue. 
Step-by-step transformation of an upcycled dining bench, showcasing the process from applying crackle glaze to the final custom-stained piece. | on the creek blog // www.onthecreekblog.com


Crackle, Pop, Wow! 

Next up was the crackle glaze, a first for me! It's like applying invisible ink—you can't see it, but you know it's there. I slathered it on and waited for the magic to happen. And voila! The crackle effect was born. 

Antique or Not? 

I then experimented with antiquing glaze, and let's say it was a learning curve. It went from "vintage chic" to "dungeon grim" real quick. Hubby stepped in to finish the application while I played damage control with a light coat of white paint. Crisis averted! 
Step-by-step transformation of an upcycled dining bench, showcasing the process from applying crackle glaze to the final custom-stained piece. | on the creek blog // www.onthecreekblog.com

The Grand Finale 

Finally, it was time to crown our bench with its top. I roughed up the seat pieces for an aged look before staining them with a custom mix of Special Walnut and Jacobean. A few coats of sealer later, and our bench was ready for its close-up! 
Step-by-step transformation of an upcycled dining bench, showcasing the process from applying crackle glaze to the final custom-stained piece. | on the creek blog // www.onthecreekblog.com

Step-by-step transformation of an upcycled dining bench, showcasing the process from applying crackle glaze to the final custom-stained piece. | on the creek blog // www.onthecreekblog.com


The Final Reveal 

I'm head over heels for how it turned out! It's a blend of old and new, chippy yet chic, and it's hands-down my favorite furniture piece to date. 

Final Thoughts

Sending you all the creative vibes! If you're feeling inspired, why not try upcycling a piece of furniture? Share your projects with me by tagging @OnTheCreekBlog on social media. I can't wait to see your creations! 🎨👀

Shop this post! As an Amazon Associate, I earn from qualifying purchases. 

On the Creek blog is proud to be a part of the T&J Maintenance family - turning houses into homes.