Tuesday, April 30, 2019
Wednesday, April 24, 2019
Hey there, Besties! 🌟
Amidst the whirlwind of our massive basement decluttering saga (more on that journey tomorrow!), I stumbled upon a gem waiting patiently for its turn to shine: a quaint little green end table. It's time this piece gets the makeover it deserves, and I'm buzzing with excitement to share the journey with you!
From Clutter to Creativity
As we've been clearing the decks down below, my hubby carved out a slice of the basement just for me—a cozy nook I've affectionately dubbed my "workshop." It's simple: a spacious table by an outlet, but it's all mine. Here, I can dive into my projects without turning our kitchen table into a warzone of crafts and sawdust. Freedom at last!
A Vision for Renewal
The plan? To lovingly restore each treasure, starting with this end table, and then, fingers crossed, debut them at a pop-up sale during our annual yard sale in August. It's a lofty goal, especially with the carousel of life spinning as it does, but where there's a will (and a paintbrush), there's a way.
The Little Green Table That Could
This end table, a Habitat For Humanity ReStore find, has been biding its time in the shadows of my basement. It's drenched in green—top, bottom, and hardware, all courtesy of its previous owner's enthusiasm for green spray paint. While their green vision is clear, I'm dreaming of something a bit more natural.
The Makeover Begins
Armed with my electric sander, I'm ready to tackle the sea of green, aiming to reveal the table's original charm and character. The hardware has a special place in my heart, so it's staying—with a little color update. I'm mentally preparing for the sanding marathon ahead; after all, a little elbow grease is a small price to pay for transformation.
Stay Tuned for the Transformation
This end table's journey from a forgotten green relic to a cherished piece with a natural vibe is just beginning. I promise to keep you in the loop with updates, tips, and maybe a few laughs along the way.
Here's to the magic of transformation, to finding beauty in the forgotten, and to the endless possibilities that a bit of sandpaper and vision can bring. Let's make this little table less about the green it was and more about the beauty it's destined to become. 🌿✨
Tuesday, April 23, 2019
Hey there, Besties! 🌟
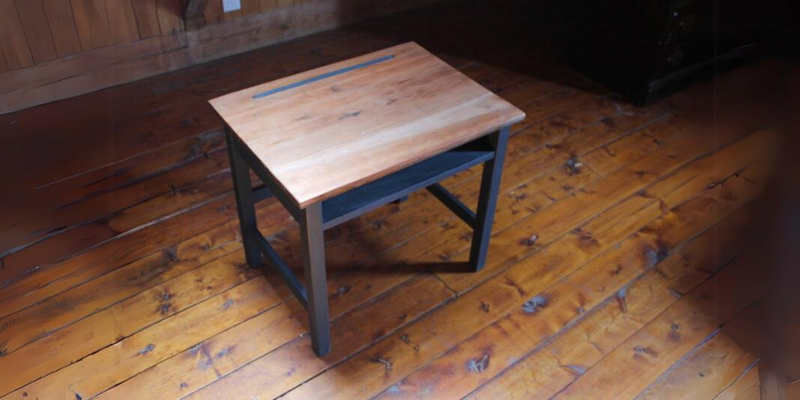
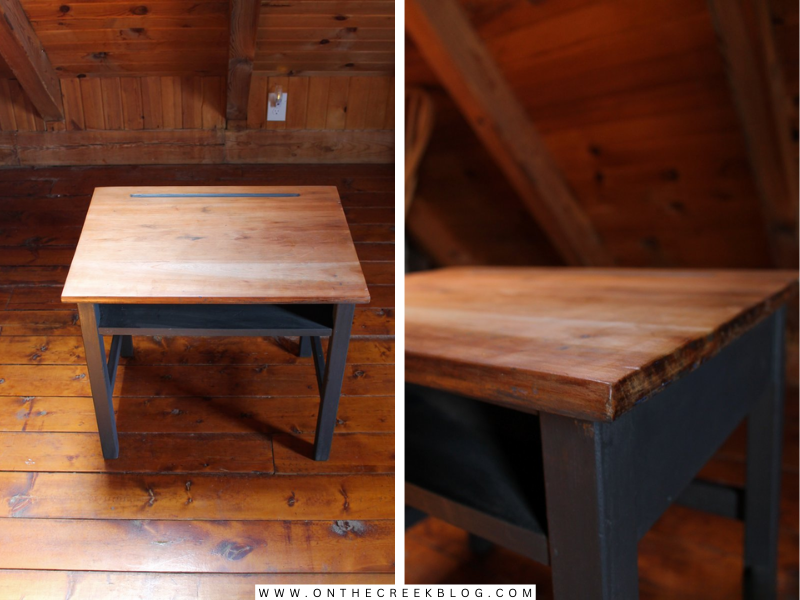
Today, I'm thrilled to share a journey of transformation – a vintage school desk, from forgotten to fabulous! This little desk, which I found at a yard sale, waited patiently outdoors for its Cinderella moment. And oh, did that moment arrive!
📷 Before the Magic
Here's a peek at the desk before its makeover. Its journey from a weathered piece to a chic, modern marvel began with stripping the top to its bare wood essence and choosing the perfect paint - Annie Sloan Chalk Paint® in Graphite, for that sophisticated touch!
🛠️ The Labor of Love
Refinishing furniture, as you know, is a labor of love. It's about cherishing the process as much as the result. My hubby and I teamed up, sanding and painting, sharing laughs and stories. These moments of togetherness make DIY so much more than just a project.
🎨 The Power of Paint
Choosing the right paint is key. I went with Annie Sloan Chalk Paint in Graphite for its modern vibe. A pro tip from me: Be fearless in experimenting with colors and techniques. It's amazing what new favorites you can uncover!
✨ The Finishing Touch
To seal the deal, I used Annie Sloan Clear Chalk Paint Wax, perfect for protecting and highlighting the natural beauty of the wood. The final result? A stunning piece that's not just furniture but a story reborn.
💭 Final Thoughts
Every piece of furniture has its own tale. By giving this school desk a new chapter, I've woven a piece of my story into it, creating something unique and heartfelt.
Remember, in our 'Earth School,' every DIY project is a lesson in creativity and love. Keep shining, Besties! 🌍✨
Thursday, April 18, 2019
Hey there, Besties! 🌟
I've got a little confession to make: while I've been preaching patience this spring, waiting on the mulch and the mowing, my heart couldn't resist the pull of my beloved chair planters. Yes, they're already out in the yard, brightening up the space with their charming presence, even though they're still waiting for their floral companions.
A Clever Solution to Clutter
The truth? I was partly motivated by our mission to declutter the basement. The chair planters were there, taking up space, whispering spring promises. So, outside they went! And though I could've tucked them away out of sight, their rightful place is in the garden, standing proud and flowerless (for now), a testament to my eagerness for the season ahead.
A Stroll Down Memory Lane
Since my planters are already basking in the anticipation of spring, why not dive into a bit of nostalgia and share some chair planter inspiration from years past? These photos, capturing the essence of seasons gone by, are a vibrant reminder of the beauty that's yet to come.
The Art of the Traditional Chair Planter
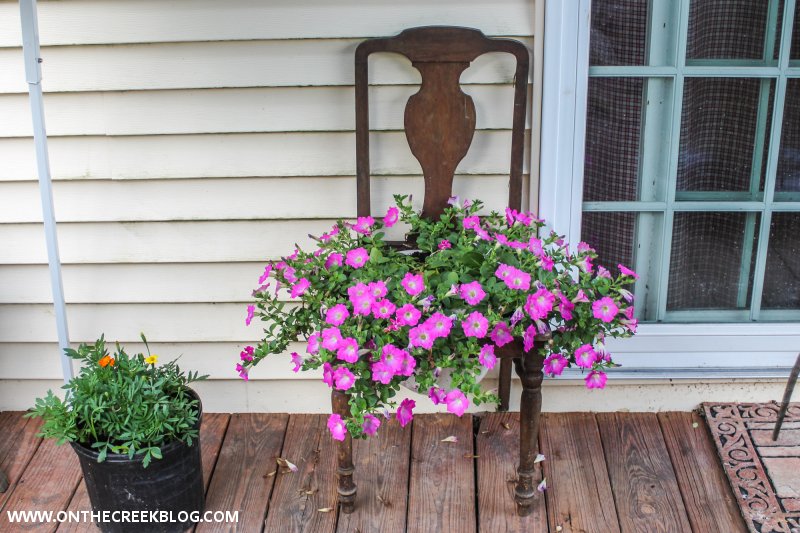
The secret to a stunning chair planter? It's all about choosing lush, overflowing blooms that drape elegantly over the sides, transforming an ordinary chair into a living masterpiece. My mom's garden serves as the perfect muse for this approach, with chairs that become the canvas for an explosion of color and life.
My Quirky Twist
I admit, I've always marched to the beat of my own drum, preferring to perch my plants atop the chairs in old sap buckets, creating a unique fusion of rustic charm and botanical beauty. By adding stones for stability and topping them off with soil, my planters stay put, even on the breeziest of days.
The Joy of Yard Sale Finds
And then there's my delightful discovery of goose planters at a yard sale, which have found their quirky perch atop my chair planters, adding a whimsical touch to the garden.
Embracing New Ideas
Inspired by my mom's ingenious method of integrating a planter directly into a chair, I'm buzzing with excitement to experiment with this concept, especially for those chairs in my collection that are missing their seats.
The Promise of a Floral-Filled Future
As the greenhouse visits loom on the horizon, I'm dreaming of filling my chair planters with a cascade of blooms, perhaps even mastering the art of the overflowing floral chair this year.
So, Besties, as we tiptoe into spring, let's remember that it's more than okay to start dreaming of our gardens, to bring out the pieces of our hearts that belong among the flowers, even if it's just a bit early. After all, what's a garden without a bit of anticipation and a whole lot of love? 🌸💕🌱
Wednesday, April 17, 2019
Tuesday, April 16, 2019
The Constant Evolution of My Craft
Hey, my creative souls! Let's dive into the transformative world of filters in photography. My journey in capturing life's moments is a never-ending adventure, making it so exhilarating. Being self-taught means I'm always in the lab—both behind the lens and in the editing suite.
The Time Crunch: My Old Editing Woes
Time was once my nemesis. Editing photos used to be a marathon, and while the creative process was a joy, being shackled to my computer was not. And the wait time for my clients? A week might not sound like much, but it's an eternity when you're as impatient as me.
Lightroom: My Game-Changer
Enter Lightroom, my creative sanctuary. I was hesitant at first, but there was no turning back once I embraced it. It streamlined my workflow and even has a Discover tab where you can download new filters. The best part? I can edit anywhere, even from my tablet. Talk about a win-win!
The Joy of Revisiting Old Snaps
One of my not-so-secret joys? Breathing new life into old photos. Lightroom makes this a walk in the park. A quick hop into my albums and past work is ready for a fresh glow-up.
Filters: The Unsung Heroes
As my techniques evolve, I'm always on a treasure hunt for new filters and even crafting my own. Filters are like the fairy godmothers of photography—they can transform a photo into a whole new visual story.
A Recent Re-editing Adventure
I recently switched up some photos James captured of me by the lake. A new filter later, and they're radiating all the feels. I'm head over heels!
Keep Growing, Keep Snapping
The moral of the story? Never stop evolving. I'm buzzing to see where my next photo and filter experiment will lead me.
Sending you all the creative vibes! If you're vibing with my journey, hit that share button. Your support is my creative fuel.
Thursday, April 04, 2019
Hey, Besties!
If you've been following our journey at the Kay House Reno, you know we've had to get creative with some of our design choices. Today, I'm diving into a project that turned a plain, builder-grade bathroom vanity into a statement piece: textured spray paint countertops!
The Challenge: A Basic Bathroom Vanity
We had to keep the existing bathroom vanity for reasons I'll delve into in a future post. While it was in good shape, it lacked that "wow" factor I crave in my designs. It was time for an upgrade!
The Inspiration: A Pinterest Discovery
As someone constantly scrolling through Pinterest for inspiration, I stumbled upon a pin about textured spray-painted countertops. Intrigued, I clicked over and discovered a whole new world of possibilities. But the question remained: would this work in real life?
The Experiment: A Small Vanity Makeover
I decided to test this out on our small vanity. Its compact size made it the perfect candidate for a trial run. Here's how we transformed it:
Step 1: Surface Preparation
- What We Did: Removed the sink and lightly sanded the laminate surface. Wiped it clean to ensure a smooth painting process.
Step 2: Area Preparation
- What We Did: Taped paper around the edges and covered the sink with thick plastic to prevent spray paint splatter.
Step 3: The Painting Process
- What We Used: Rust-Oleum American Accents® Stone Spray Paint
- What We Did: Applied several light coats, building up the texture. Patience is critical here; let each coat dry before applying the next.
Step 4: The Finishing Touch
- What We Used: Triple-thick polyurethane
- What We Did: Applied several coats until the surface was smooth. For a more durable finish, consider investing in a heavier top coat.
The Verdict: A High-End Look for Less!
I couldn't be happier with the results! The textured spray paint gave the countertop a luxurious feel without breaking the bank. In fact, I loved it so much that we applied the same technique to our master bath vanity!
Final Thoughts
This project proves that you can transform even the most basic elements in your home with some creativity and elbow grease. Stay tuned for more Kay House Reno updates and DIY adventures!
Shop this post! As an Amazon Influencer, I earn from qualifying purchases. As always, thank you so much for supporting my blog.


