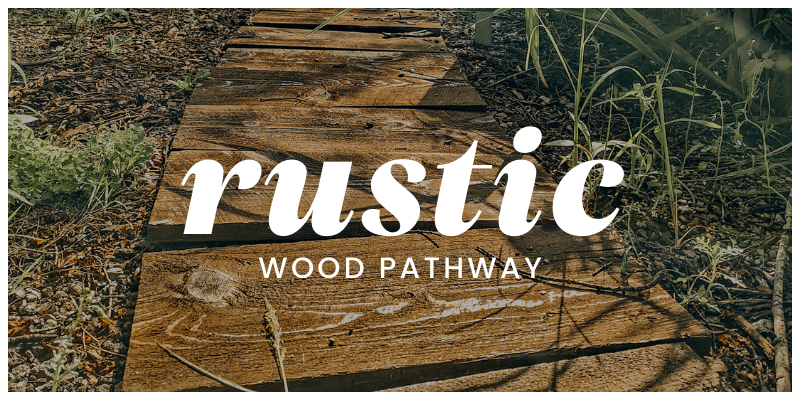
If you're a rustic, whimsical aesthetics fan, you won't want to miss this update on my charming wood pathway. Initially built in 2019, the path has found a new home by the Little Free Library. With the mulch area shrinking, this was the perfect opportunity to give the pathway a new lease on life. Despite some wear and tear, the character and charm of the path have only grown over the years. If you're curious how it fits in with the rest of the property, you will want to see this post!
Friday, August 18, 2023
Monday, September 20, 2021
How to distress painted furniture.
After all the projects I've done, I can't believe I've never written a post on how to distress furniture! I have mentioned my techniques a lot but I have never made a post dedicated just to distressing furniture.
That's what I'm going to be doing today!
Distressing furniture is an easy process to make furniture look old & worn.
Why do I need to distress furniture?
I usually end up with the worst of the worst furniture where preserving old paint is impossible. Most of the pieces I deal with are either not painted at all or the paint is usually mostly gone. While distressing furniture takes off the paint, I still like to have some paint on the pieces.
Also, I like to make furniture pieces appear old. It's a lot cheaper for me to buy junk pieces & transform them myself than to buy authentic old furniture. I also get nervous around old furniture/investment pieces. I'm afraid it will scuff or break & I'll lose out on my investment.
Tuesday, January 19, 2021
Hey there, Besties! 🌟
Get ready for a sprinkle of DIY magic with a dash of thrift store charm! I kicked off 2021 with a super sweet, oh-so-simple project that's got me all heart-eyed. 🖼️✨ Remember that old picture frame gathering dust in the corner? Well, it's time to give it a fabulous new life as a dry-erase board!
Why a Dry Erase Board, You Ask?
Picture this: It's Christmas, and our adorable foster kiddo just got "The Almanac of Fun Book + Calendar Set." It's like a treasure trove of giggles and weird holidays! I thought, "Hey, why not make this a fun family adventure?" 💡📆
So, I dreamed up the perfect spot to jot down all those quirky holidays and upcoming fun stuff from the book. And voilà, the idea of a dry-erase board popped into my mind!
Scavenging the House for Treasures
True to my thrifty soul, I didn't want to spend a dime. So, I turned my house upside down (in the best way!) to gather everything I needed. 🏡💖
What You'll Need:
- A picture frame with glass (the more character, the better!)
- Paint (if you feel like adding a splash of color)
Creating the Magic
I found this old picture frame that was just begging for a second chance. Lucky for me, the glass was still perfect for a dry-erase board.
Channeling my inner artist, I whipped out some Fusion Mineral Paint in "Homestead Blue" to jazz up the frame. 💙🖌️
Since my frame was missing its backing, my handy hubby James cut a board we had from another project (I love it when things come together like that!).
After the paint dried, we assembled it back together, and ta-da! A charming dry-erase board was born!
Final Touches and Thoughts
Keeping in tune with my 'simplify life' mantra, I absolutely adored how this project was quick and easy, giving that old frame a new lease on life. Plus, it decluttered my basement – bonus!
I might add some pretty paper to the backing later, but for now, it's perfect in its simplicity.
This little gem will be the star of our "Almanac of Fun" journey! Can't wait to share more of these moments with you all. 💫
P.S. Shop this post! As an Amazon Associate, I earn from qualifying purchases and always search for the next thrifty find! 🛍️✨
Monday, May 11, 2020
 A primitive table gets a cute & updated makeover!
We completed this project last year, but I’m just getting around to posting it today!
I actually gave this table a little refresh over the weekend which inspired me to share it!
The table is far from perfect, but I love the primitive vibes it has!
I’m all about trash to treasure makeovers & this table is a true reflection of that!
Can you believe we picked this table up for free in front of someone’s house?! We were driving by & saw this falling apart table with a ‘free’ sign next to it & immediately turned around to take a look!
The table was in rough shape, but it was free so I wasn’t afraid to take a chance on it.
Tuesday, May 05, 2020
This was one of those projects that I’ve been wanting to do forever & it finally happened!
Last year, we acquired some old posts & they just sat outside in the yard, waiting for something to be done with them. Because of bugs, I didn’t want to bring them into the house, so an outdoor eyesore they became!
One day, I decided that they would make a good pergola. There was a spot in our yard between our water well & our lilac tree that I thought would be perfect for a pergola. I also hated mowing that tiny area so I wanted to get rid of it!
Finally, after months & months of wanting to build it, we finally did it!
Monday, May 04, 2020
Hey, Besties!
The Bench's First Fitting
The Color Palette
Crackle, Pop, Wow!
Antique or Not?
The Grand Finale
The Final Reveal
Final Thoughts
Tuesday, April 28, 2020
We finally made another dining bench!
The first dining bench we made last year was awesome, but it was a little narrow for sitting. We planned on making another dining bench, but life got in the way.
Well, the time finally came to build another bench!
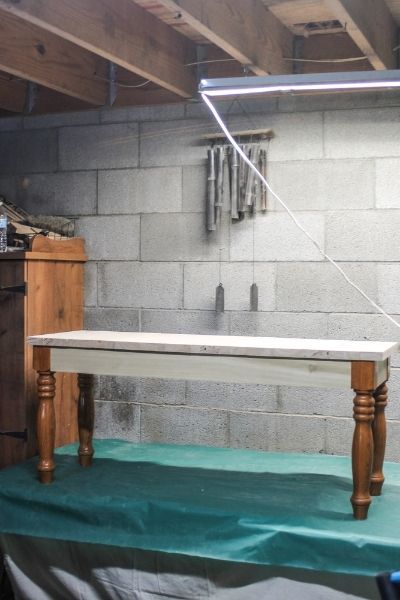
This dining bench is upcycled from an old end table we picked up at a garage sale last year. The legs were cool, but the top of the end table was a little rough. Instead of refinishing it, we just decided to use the legs to create a dining bench!
Wednesday, January 08, 2020
Hey, Besties!
Do you know that feeling when the thrift store gods smile down on you? That's exactly what happened when I stumbled upon this adorable washstand. And the best part? It's car-friendly!
The Heartbreak of Thrift Store Finds
Let's rewind a bit. I've had my share of thrift store heartbreaks—those moments when you find the perfect piece, but it's just too big to fit in the car. Ugh, right? But not this time!
The Decision Moment
So, there I was, waiting for another customer to decide. She was in front of the washstand, contemplating, maybe even having a mental flowchart moment (we've all been there). Finally, she walks away. My turn!
Love at First Sight
One look at the rustic back of this piece, and I knew it was coming home with me. Sure, it had its quirks—a crack here, a missing knob there—but that makes it special.
The Makeover Begins
Choosing the Perfect Hue
Time for a makeover! I was vibing with a sunny yellow, so I chose "Cork Board" by Dutch Boy. First, I tackled the drawers and the door. A little sanding, a little distressing, and voila! Rustic chic achieved.
To Top Coat or Not to Top Coat
Now, let's talk top coat—or the lack thereof. I skipped it! Why? Because I used outdoor paint, and that stuff's built to last.
The Finishing Touches
The finishing touch? Some hardware I had lying around. A quick spray paint session later, and those knobs were looking fab in black.
The Reveal
Y'all, I'm smitten. This might be my favorite furniture flip yet!
Sending You All the Creative Vibes
Feeling inspired? I'd love to see your own furniture transformations! Please share them with me using the hashtag #OnTheCreek, and let's spread the creative vibes together!🌿💕
Tuesday, July 09, 2019
My husband, James, & I added a brand new mulch area to the side of our home this spring (you can read all about that here). We made sure to make the new area a little bit bigger to accommodate a pathway.
Then, like most things at our home, the area sat empty for a couple months while deliberations were happening!
I wanted to use wood from pallets to create the pathway. I've seen so many cute ideas on Pinterest & I wanted to recreate them for our pathway. Also it would be practically free because we already have several pallets laying around.
But...here's the thing:
James hates repurposing stuff, especially wood. He worked in the construction/carpentry field for many years & has an extreme hatred for reusing old materials. He would much rather use things that aren't all twisted & beat up with nail holes everywhere, which is totally understandable. New materials are easier to work with.
Thursday, April 04, 2019
Hey, Besties!
If you've been following our journey at the Kay House Reno, you know we've had to get creative with some of our design choices. Today, I'm diving into a project that turned a plain, builder-grade bathroom vanity into a statement piece: textured spray paint countertops!
The Challenge: A Basic Bathroom Vanity
We had to keep the existing bathroom vanity for reasons I'll delve into in a future post. While it was in good shape, it lacked that "wow" factor I crave in my designs. It was time for an upgrade!
The Inspiration: A Pinterest Discovery
As someone constantly scrolling through Pinterest for inspiration, I stumbled upon a pin about textured spray-painted countertops. Intrigued, I clicked over and discovered a whole new world of possibilities. But the question remained: would this work in real life?
The Experiment: A Small Vanity Makeover
I decided to test this out on our small vanity. Its compact size made it the perfect candidate for a trial run. Here's how we transformed it:
Step 1: Surface Preparation
- What We Did: Removed the sink and lightly sanded the laminate surface. Wiped it clean to ensure a smooth painting process.
Step 2: Area Preparation
- What We Did: Taped paper around the edges and covered the sink with thick plastic to prevent spray paint splatter.
Step 3: The Painting Process
- What We Used: Rust-Oleum American Accents® Stone Spray Paint
- What We Did: Applied several light coats, building up the texture. Patience is critical here; let each coat dry before applying the next.
Step 4: The Finishing Touch
- What We Used: Triple-thick polyurethane
- What We Did: Applied several coats until the surface was smooth. For a more durable finish, consider investing in a heavier top coat.
The Verdict: A High-End Look for Less!
I couldn't be happier with the results! The textured spray paint gave the countertop a luxurious feel without breaking the bank. In fact, I loved it so much that we applied the same technique to our master bath vanity!
Final Thoughts
This project proves that you can transform even the most basic elements in your home with some creativity and elbow grease. Stay tuned for more Kay House Reno updates and DIY adventures!
Shop this post! As an Amazon Influencer, I earn from qualifying purchases. As always, thank you so much for supporting my blog.


