How to distress painted furniture.
After all the projects I've done, I can't believe I've never written a post on how to distress furniture! I have mentioned my techniques a lot but I have never made a post dedicated just to distressing furniture.
That's what I'm going to be doing today!
Distressing furniture is an easy process to make furniture look old & worn.
Why do I need to distress furniture?
I usually end up with the worst of the worst furniture where preserving old paint is impossible. Most of the pieces I deal with are either not painted at all or the paint is usually mostly gone. While distressing furniture takes off the paint, I still like to have some paint on the pieces.
Also, I like to make furniture pieces appear old. It's a lot cheaper for me to buy junk pieces & transform them myself than to buy authentic old furniture. I also get nervous around old furniture/investment pieces. I'm afraid it will scuff or break & I'll lose out on my investment.
So, how do I distress furniture?
There are 2 ways I distress furniture: crackle glaze & sanding.
No matter which technique I'm going to use, I start off in the same way: I clean & repair the furniture if necessary. Then, depending on the finish, I either leave it alone or paint a bottom coat.
The point of distressing is to see the paint/stain underneath so I always want it to look its best. If the furniture piece has an even stain or paint underneath, I leave it alone. If I don't like the base coat, I'll usually paint it an even coat.
Once the bottom coat is prepped, it's time for the top coat. This is where the 2 distressing techniques go in different directions.
Crackle glaze
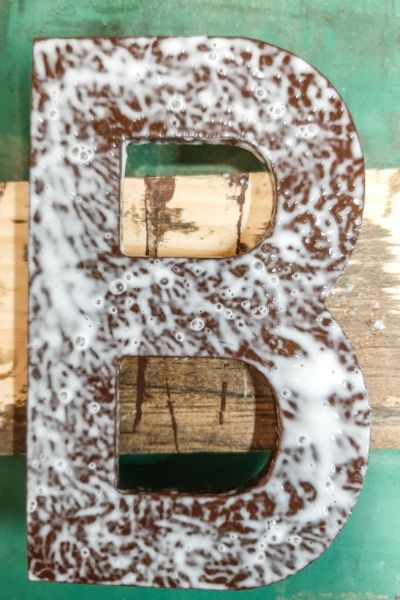
I go in depth on applying crackle glaze in my solar chandelier post & another crackle technique in my crackle letter post.
Basically, crackle glaze (or glue) is a medium applied in between the bottom & top coats. You generally let it get a little tacky & paint your top coat over it. The paint reacts with the crackle glaze & creates a chippy looking finish. The crackle glaze does all the work of distressing.
I've only done crackle glaze (& glue) on a few projects but I really like the results. Overall, the finish looks authentically chippy & old. It gets a little uneven with larger pieces so I try to stick to smaller pieces to use this on.
A downside of crackle glaze (& glue) is that it's for interior use only. I did use crackle glaze on a chair that is outside & some of the paint came off.
Sanding
Sanding is a pretty easy way to distress furniture.
You just paint the top coat & use sandpaper to take off the paint to reveal the bottom coat.
Because I'm impatient, I usually just paint the top coat, wait a very short time & then use a sanding sponge to distress. The paint comes off a lot easier when it's not totally dry. If it is completely dry, I may have to use an electric sander.
I've sanded a lot of projects & the results are usually nice. If I distress too much, I can always paint back over areas. Sanding gives you more control over the look of the entire piece & that's why I like using it on larger projects.
A downside of sanding is that it gives a flat finish which doesn't look authentically chippy.
Conclusion
Both sanding & crackle glazing have upsides & downsides. I really depends on what type of project you'll be using it on & what you want your finish to look like.
Here are some posts I've written using the 2 techniques:
Distressed furniture posts
- Church Pew Makeover
- DIY Bathroom Shutters
- Wash Stand Makeover
- Chippy Yellow Chair
- Chippy & Rustic Candle Holder
- Chippy Picture Frame DIY
- Shelf Makeover
Crackle glaze posts
- Creating a Crackled & Distressed Finish Using Glue
- Farmhouse End Table Makeover
- Pergola Solar Chandelier
- Painting our Upcycled DIY Dining Bench

.png)


I read the above article and I got some knowledge from your article. Affordable Furniture Shop In Singapore, It's actually great and useful data for us. Thanks for share it.
ReplyDelete