Showing posts with label recipe. Show all posts

Wednesday, January 05, 2022

,

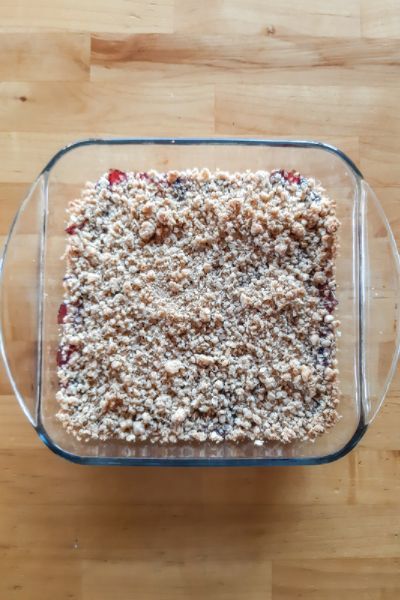
Easy Fruit Crisp Recipe | On The Creek Blog // www.onthecreekblog.com
A super easy fruit crisp recipe!

I was originally going to share this recipe in the fall but it was a busy time & I never got around to posting it.

I always thought of fruit crisp as being a fall recipe.  The truth is, it's good any time of the year!

I used a can of blueberry pie filling when I made it but it would be so great with seasonal fruits throughout the year!

My mom has been making this fruit crisp recipe for years.  It's the best!  I never realized how easy it was to make until I made it yesterday.  It has been years since I made it & I forgot how easy it is.  There are only 5 ingredients total!  It also comes together super quickly.  Another thing I love is that it only takes one bowl to make & the bowl is pretty clean when it's done.  I hate cleaning up a lot of messy dishes!


Friday, January 08, 2021

,

Image of Tiff's homemade wine making process with Brewsy, featuring a collection of ingredients like grape and cherry juice, cane sugar, and the Brewsy kit, with steps of the wine making process displayed in a warm, inviting kitchen setting. | on the creek blog // www.onthecreekblog.com

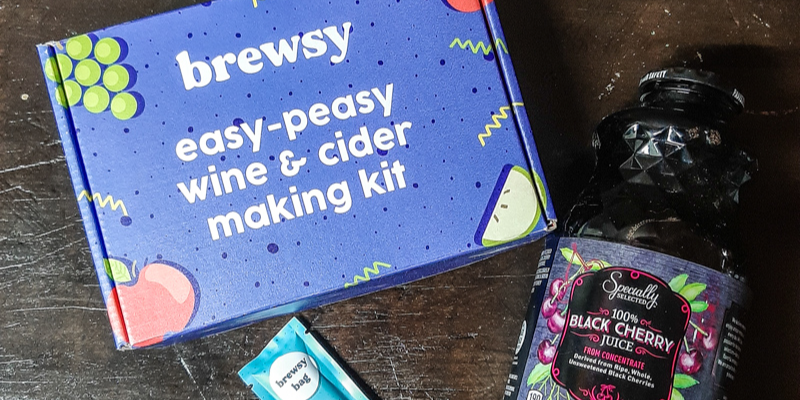
Hey Besties! 🌟 So, I had this serendipitous encounter with Brewsy back in fall 2020. Picture this: I'm scrolling through Instagram and bam! Brewsy's ad pops up. As a wine enthusiast, I've always been curious about making my own but thought it was super complicated. Then Brewsy came along, promising ease and fun, and I was like, "Yes, please!" So, I snagged their welcome and bottling kits right away.


Life, as it does, threw me a few curveballs (hello, foster placements!). My winemaking dreams took a backseat... until Christmas rolled around. 🎄 The thought of sipping homemade wine during the festive season? Irresistible!


My first batch was such a hit that I dove right in for a second round, and guess what? I'm bringing you along for this grape-to-glass journey today! 🍇✨


Before we get into the nitty-gritty, here's a sweet deal for you: a special coupon code at the end of this post for savings on all things Brewsy!


What's Brewsy?

It's a fab little kit that transforms any juice into a robust 15% ABV wine in just 5 days. With the Welcome Kit, you're all set to make 12-18 bottles of your very own vino. Just grab refill bags when you need more.


I'm about to give you the lowdown on my winemaking escapade. Trust me, Brewsy's instructions are gold, but here's my own 'Tiff's Twist' on it!

Image of Tiff's homemade wine making process with Brewsy, featuring a collection of ingredients like grape and cherry juice, cane sugar, and the Brewsy kit, with steps of the wine making process displayed in a warm, inviting kitchen setting. | on the creek blog // www.onthecreekblog.com


What You'll Need:

  • Brewsy Welcome Kit
  • Your choice of juice (I went with grape and cherry)
  • Cane sugar
  • Optional: Bottling Kit, Glass Gallon Jugs

Let's Make Wine!

  1. Pick Your Juice: You can get creative here. Cherry, grape, you name it!
  2. Sweetness Level: Brewsy's calculator is a gem. It helps you determine how much sugar to add based on your sweet tooth and the type of wine you aim for.
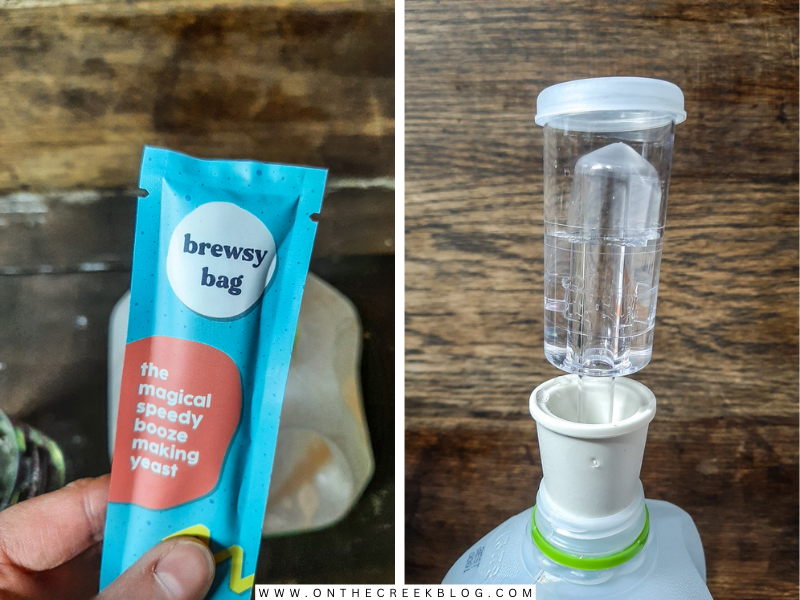
  3. Mix It Up: Pour sugar into a gallon container, add juice, and shake it up. Drop in a Brewsy bag and shake again.
  4. Set It and Forget It: Almost! First, it brews at 75-80 degrees for 3 days, then chills in the fridge for 2 more. The yeast does its magic, and voilà – wine!
Image of Tiff's homemade wine making process with Brewsy, featuring a collection of ingredients like grape and cherry juice, cane sugar, and the Brewsy kit, with steps of the wine making process displayed in a warm, inviting kitchen setting. | on the creek blog // www.onthecreekblog.com

Image of Tiff's homemade wine making process with Brewsy, featuring a collection of ingredients like grape and cherry juice, cane sugar, and the Brewsy kit, with steps of the wine making process displayed in a warm, inviting kitchen setting. | on the creek blog // www.onthecreekblog.com


Racking and Enjoying

After brewing, you'll want to rack the wine (separate it from the sediment). It gets better with age, but keep it refrigerated since it's all-natural with no preservatives.


Special Brewsy Discount for You!

Ready to join the winemaking club? Grab your Brewsy kit with a sweet $15 off using my link: [http://rwrd.io/y8xtzcm?c]

Image of Tiff's homemade wine making process with Brewsy, featuring a collection of ingredients like grape and cherry juice, cane sugar, and the Brewsy kit, with steps of the wine making process displayed in a warm, inviting kitchen setting. | on the creek blog // www.onthecreekblog.com

Final Sip of Thoughts

Making wine with Brewsy has been an absolute blast! Can't wait to experiment with more flavors. If you try it, let me know your experience!


Shop this post! As an Amazon Associate, I earn from qualifying purchases.


Wednesday, May 20, 2020

,

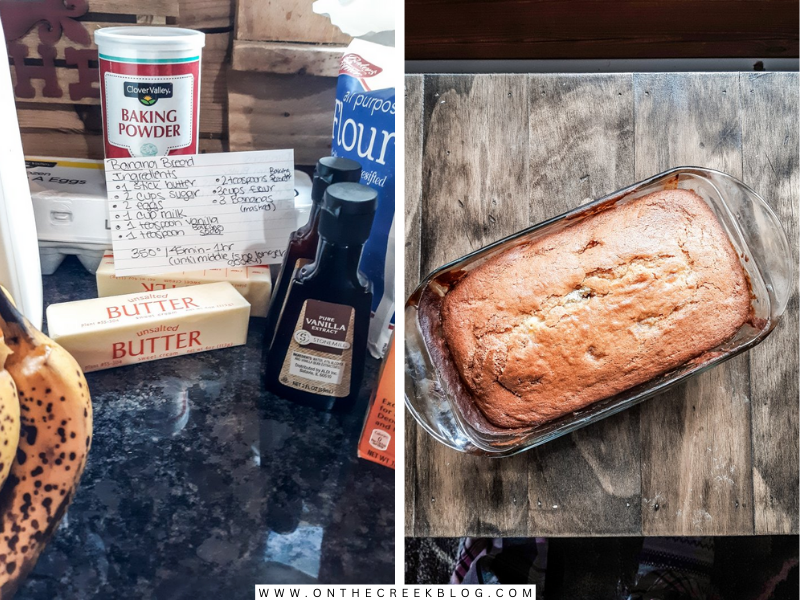
Image of homemade banana bread loaves fresh from the oven, showcasing a golden-brown crust and a moist, fluffy texture, set against the cozy backdrop of Tiff's kitchen. | on the creek blog // www.onthecreekblog.com

Hey Besties! 🌟 Guess what? I've stumbled upon the holy grail of banana bread recipes, and I've been obsessed for months! 🍞✨


A few days back, I found myself with a bunch of super-ripe bananas (you know, the perfect banana bread kind!). So, what did I do? I whipped up not one but several loaves of this heavenly bread!

Here's a funny twist: the original recipe was just a screenshot on my tablet, with no website or author's name. Wanting to give a shout-out to the genius behind this yumminess, I turned into a detective on Google. 🕵️‍♀️ Believe me, finding this needle in the haystack of a million banana bread recipes was no small feat!


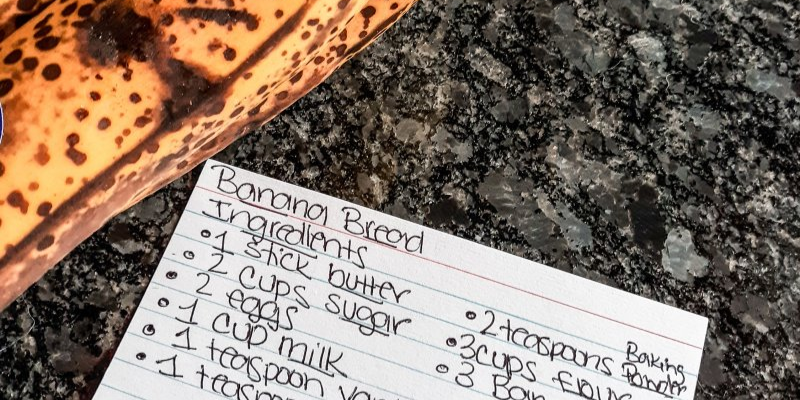
I'm such a repeat offender with this recipe that I finally wrote it down. No more squinting at a flour-smudged tablet screen for me! 📱💁‍♀️

Image of homemade banana bread loaves fresh from the oven, showcasing a golden-brown crust and a moist, fluffy texture, set against the cozy backdrop of Tiff's kitchen. | on the creek blog // www.onthecreekblog.com


The other day, I decided to double the recipe while in my baking frenzy. Picture this: my KitchenAid mixer practically doing acrobatics to mix all those bananas! 🍌🎪 A word of advice? Stick to single batches, folks!


I usually jazz up my banana bread with walnuts and chocolate chips. But, surprise! I was out of walnuts and didn't dare overload my already overworked mixer. So, I went old school and baked it plain. And guess what? It was a smash hit, even without the frills! 🎉


I made so much I thought I'd freeze some for later. Who was I kidding? In our house, banana bread vanishes faster than a magician's rabbit! 🐰✨ It's just that delicious!

Image of homemade banana bread loaves fresh from the oven, showcasing a golden-brown crust and a moist, fluffy texture, set against the cozy backdrop of Tiff's kitchen. | on the creek blog // www.onthecreekblog.com


Want in on this banana bread magic? Head over to the blog for the recipe! It's a game-changer! 🍌🌟

[Link to the recipe]


Shop this post! As an Amazon Associate I earn from qualifying purchases.

Friday, May 08, 2020

,
peartitleBeautiful to pear blossoms!

I’ve shared some pictures of my parents’ pear tree in the past.  I thought I’d take you along this year from the beginning:  the blossoms!

The pear tree always does extremely well & produces a ton of pears, but it has really shown up this year!

There are blossoms everywhere!

This is a Bartlett pear tree & full pears should be ready by the end of August or early September.

When it’s harvest time, there will be plenty of pears to eat & make things from!  I’ve gathered some recipes that would be perfect for these Bartlett pears!


Tuesday, April 02, 2019

,

Perfect hard boiled eggs | Super easy to make & the eggshells come right off!


A super easy technique for making hard boiled eggs!

Tuesday, March 12, 2019

,

Shake It Up: My Top 3 Protein-Packed Creations for a Yummy Health Boost! | on the creek blog // www.onthecreekblog.com


Hey Besties! 🌟✨


I'm super excited to share a little secret with you all - I've been whipping up some absolutely delish protein shakes lately! Now, I'm no stranger to protein shakes, but let's just say my taste buds, and I have had our ups and downs with them. That was until I discovered Orgain Protein powder - a game changer, especially for those like me who sometimes do a little dance with dairy sensitivity.


Picture this: I'm rummaging through my kitchen cupboard, and what do I find? A tub of PBfit! I thought, why not jazz up my protein shake routine? Spoiler alert: it was a peanut buttery slice of heaven!


So, let me spill the beans (or should I say the powder?) on these protein-packed concoctions. Feel free to play around with the kinds of milk, fruits, and creamers - it's your shake, your rules!

Shake It Up: My Top 3 Protein-Packed Creations for a Yummy Health Boost! | on the creek blog // www.onthecreekblog.com


Coffee Protein Shake

  • 2 scoops Orgain Vanilla Bean
  • 1 cup brewed coffee (chilled because we're cool like that)
  • A dash of coffee creamer (for a little extra pizzazz)
  • A dozen ice cubes (or, as I like to call them, chill pills)

Just blend it all up until it's as smooth as our crafting skills!

Shake It Up: My Top 3 Protein-Packed Creations for a Yummy Health Boost! | on the creek blog // www.onthecreekblog.com


Fruit Protein Shake

  • 2 scoops Orgain Vanilla Bean
  • 1 cup Coconut Milk (because we're all about that tropical vibe)
  • 1 cup Wellness Blend frozen fruit (shoutout to Aldi!)

Blend, baby, blend! Until it's as colorful as our DIY projects.

Shake It Up: My Top 3 Protein-Packed Creations for a Yummy Health Boost! | on the creek blog // www.onthecreekblog.com


Coffee & Peanut Butter Shake

  • 2 Tablespoons PBfit (peanut butter paradise, here we come!)
  • 1 cup brewed coffee (chilled, again, because we're cool)
  • A dash of coffee creamer (because why not?)
  • A dozen ice cubes (our frosty friends)

Blend it up until it's as smooth as our latest thrift store find!


And there you have it, my dear friends - my top three protein shake recipes that are as fun to make as they are to drink! I'll share more of my shake adventures on Instagram, so be sure to catch them in my stories.


Stay creative and healthy, my friends! 🌍✨🥤

Shake It Up: My Top 3 Protein-Packed Creations for a Yummy Health Boost! | on the creek blog // www.onthecreekblog.com

Orgain Protein Powder
- PB Fit Peanut Butter Powder

PB2 Powdered Peanut Butter

Monday, September 18, 2017

,
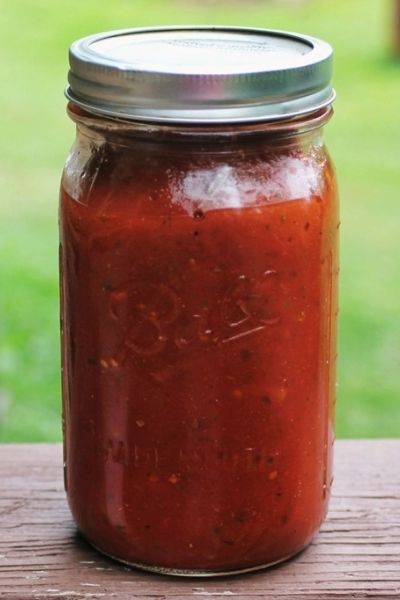
Semi-Homemade Pasta Sauce | On The Creek Blog // www.onthecreekblog.com

Semi-Homemade pasta sauce recipe!

I’ve never really been the type to make homemade pasta sauce.  That was also before I had about a million Roma tomatoes in my garden!  Since I had so many tomatoes, I decided to venture into the waters of homemade sauce making.

I imagined myself adding different spices together until I came out with the perfect pasta sauce.

In reality, I bought a pasta sauce seasoning packet at the grocery store.  It’s the same thing, right?!  Haha!

One thing I didn’t realize was that it takes a lot of tomatoes to make a sauce.  The first time I made tried to make a pasta sauce, I used 14 Roma tomatoes & came out with 2 small jars of sauce.


Thursday, July 27, 2017

,

Blueberry Pie

An homemade blueberry pie!  Fresh blueberries, white wine & a homemade crust make this pie irresistible!

Blueberry PieBlueberry PieBlueberry Pie

We went blueberry picking last weekend.  I never realized how tedious blueberry picking actually is!  It takes so long just to get a small amount a blueberries!  It also didn’t help that I chose one of the hottest days of the year!  My husband & I were actually going grocery shopping when we passed a “U Pick Blueberries” sign.  Of course, we followed the sign all over the countryside until we arrived at a wonderful farm.  We then spent the next hour or so picking blueberries & sweating profusely!

Complaints aside, it was all worth it because the blueberries were used in this amazing pie.

This pie is completely from scratch, which is a first for me.  When I worked in retail, I had a customer tell me all about her homemade apple pies.  She then asked how I make pies & I had to admit that I used a pie filling in a can.  She left me in the dust after that!  In my defense, I never knew how easy it actually is to make pie filling.  Not to mention it tastes so much better too!

Blueberry PieBlueberry PieBlueberry Pie

For the crust I used a homemade pie crust recipe I found in one of my vintage cookbooks.  It worked out perfectly.  If you don’t have a homemade pie crust that you love, check out Ali’s post on the perfect pie crust.  It’s life changing!

The pie filling is modified from Tieghan’s Mulled Cherry Bomb Pie recipe.  I used white wine instead of red & 1/2 cup more brown sugar.  It came out so good.  The white wine I used had a more mild flavor with the blueberries, which I enjoyed.

As you can tell by the pictures, I have no idea how to crimp the edges of the crust!  I just did the best I could to make sure the filling stayed in the shell!  It had a small overflow, but it wasn’t as bad as I expected!

Even though making a pie homemade is a time consuming activity, I think it’s worth it!  I’ll definitely be making more homemade pies from now on!

Blueberry Pie

Wednesday, May 24, 2017

,

Pineapple Upside Down Cake

This recipe has been a long time in the making. I attempted to make this during the winter & after about 3 failed attempts, I gave up.

The reason I gave up? 
 
The cake wasn’t photogenic.

I’ve said this a million times but I’m going to say it again:  my cooking skills are more ‘looks terrible but tastes fantastic’.  And pineapple upside down cake is the truest representation of this.  When I have to take pictures for the #omgblog, things get messy.   In my attempts at food styling, I once destroyed an entire pineapple upside down cake!  That wasn’t very fun.  I still ate it anyway because #cake, but my pineapple upside down blog post dreams were crushed…

Until today.

I finally decided to give the ol’ pineapple upside down cake another try.  With summer potluck season right around the corner, I figured now was the perfect time to make this again.  It is too good to keep to myself any longer.  So what if it looks weird?  It’s delicious! 

Aaand it’s still not photogenic!

The photos in this post are absolutely terrible & do not do this cake any justice.  For something so delicious, it’s incredibly difficult to photograph!  With a cake this good though, I don’t think you’ll have to worry about it being photogenic.  It will be gone before you could even take a picture of it!  (At least that’s what I keep telling myself! Winking smile)  But if you can make this cake photogenic, please share your secrets!

Pineapple Upside Down Cake
I snagged this recipe from my mom.  She’s been making this for years.  So many years in fact, that I remember making this recipe with her during my senior year of high school. It was for a “bring in some homemade food” thing for my Home Ec. type class.  The reason I remember this so vividly is because the night before, my senior class had their “senior prank”. It consisted of camping out on the lawn in front of the school. #sounique.  Back then, I legit couldn’t function on less than 8 hours of sleep. I got approximately 0 zero hours that night.  I was beyond tired & the only reason I stuck it out in school the next day was because I had to bring this cake to the class.  The worst part of it all? The class was in the afternoon!  But you better believe that as soon as that class was over, I was on my way home!

What I’m trying to say is that this cake recipe has been around a long time.  I didn’t want to go home in the morning, so the cake  went with me that night.  That should be its tagline:  so good it can survive a night in a car! 

Now that I’m an “adult”, I’m forced to make pineapple upside down cakes alone in my own kitchen & eat them while they’re still warm from the oven.  If only senior year me could see me now.  I actually think she would be most amazed at my ability to function on very little sleep!

Anyway, this recipe is guaranteed to be hit at your festivities, whether it's summer or not.  We actually make this a lot for my dad’s birthday in December & it’s just as good during that time of the year.  Who am I kidding though?  Cake is a good option any time of the year.  Whether you’re taking it to a summer cookout or hauling it in your car overnight for a senior class, this cake is irresistible!
I’ll admit, when I look at recipes & see tons of ingredients, my eyes start to glaze over & I generally skip over them.  This cake is an exception.  Yes, there are more ingredients than I would typically like, but the cake itself is soo good.  I’ve seen pineapple upside down cake recipes that use a boxed cake mix & I’m sure they’re good, but there’s something about a homemade cake with this recipe that makes it irresistible.

If you’re like me & have major anxiety over actually flipping the cake over, you could always leave it upside down.  Sure, it isn’t very pretty, but it can stay in the baking dish for easy transport to all of your festivities.  Even if it doesn’t look like the typical “upside down” cake, it still is delicious cake & you can’t go wrong with that.

The actual “upside down” part of this cake is so easy, though.  I’ve used a glass pan for all of my attempts & it just came right out of the pan without any problems.

Pineapple Upside Down Cake
by Tiff @ onthecreekblog.com May-24-2017
A classic homemade cake perfect for any occasion!

Ingredients

(Cake)
  • 1 1/2 cups flour
  • 2 1/2 teaspoons baking powder
  • 1/4 teaspoon salt
  • 1/3 cup butter, melted
  • 3/4 cup sugar
  • 1 1/2 teaspoons vanilla
  • 1 Egg
  • 2/3 cup pineapple juice (from can)
(Pineapple Glaze)
  • 3 Tablespoons butter, melted
  • 20oz can pineapple rings
  • 1/2 cup brown sugar
Instructions - Preheat oven to 350 degrees

(Cake)
- Combine flour, baking powder & salt.  Set aside
- In a mixing bowl, cream the butter & sugar
- Add egg & vanilla & mix until blended (about 1 minute)
- Add dry ingredients & pineapple juice, alternately.

(Pineapple Glaze)
- Pour melted butter into the bottom of an 8x8 glass cake pan in an even layer
- Sprinkle brown sugar over the butter
- Arrange pineapple rings over the sugar mixture.
(I managed to get 9 rings into the bottom by overlapping)
- Pour cake over the pineapple glaze
- Bake for about 40 minutes or until a toothpick comes out clean
- Let sit for 5 minutes & then flip!

Thursday, April 27, 2017

,

Mac+Cheese

If I had to eat one food for the rest of my entire life, macaroni & cheese would be it.  I’m not a macaroni snob, either.  I love boxed mac and fancy prepared mac the same.

Mac+Cheese

Mac & cheese was my go-to work lunch for years.  I would splurge on the hot mac from the deli.  When I wasn’t hungry but still wanted to eat a little something, I always got the microwave mac.  I even bought the frozen meal mac & cheese.  When I felt fancy, I bought the frozen meal with broccoli!

The recipe I’m sharing today is more on the fancy side, but totally easy to make!

Mac+CheeseMac+Cheese

Like all good things in my life, this recipe happened by accident.  I was originally going to prepare a red sauce ziti one night when my husband got the butter out.  He usually likes to butter the noodles before he adds sauce, but I had another idea:  why don’t we just add cheese to the buttered noodles & make a mac+cheese?

Lots of cheese & spices later, we had the most fantastic mac & cheese!

Mac+CheeseMac+Cheese

I’ve briefly mentioned before that my dad is a “kitchen sink” cook.  Leave him alone in a kitchen (or around a grill!) & the spices come out.  Everything but the kitchen sink is added to his recipes & they’re never lacking in flavor.  I still remember the time when he was left alone with the grill at my cousin’s graduation open house.  The burgers were never more flavorful!  The thing is though, it’s never a bad spice taste; it’s an interesting mixture of flavors that actually is delicious!  Even though my dad does some weird spice combinations, I’ve never tasted a bad meal from him!

While I tend to cook on the bland side, sometimes I take after my dad & kick it up a notch.  It doesn’t help that my spice rack is right above my stovetop either, which provides easy access to the spices!  For this mac & cheese, I utilized my go-to spices:  garlic powder, onion salt & pepper.  My favorite thing is adding pepper to any mac & cheese.  While I kept it mild on the actual mac, I ended up adding a ton to my individual bowl.  As I noted in the recipe, add the spices to your individual taste.  It also saves me because I never actually measure anything!  I just start adding things until I like the way it tastes!

Mac+Cheese

Mac + Cheese

by Tiff @ www.onthecreekblog.com April-27-2017

A super easy stovetop macaroni & cheese!

Ingredients

  • 16oz Macaroni Noodles
  • 8oz Shredded Cheese (I used Colby Jack & Mild Cheddar)
  • 4 Tablespoons Butter
  • 1/2 cup Milk
  • Pepper (to taste)
  • Garlic Powder (to taste)
  • Onion Powder (to taste)

Instructions

- Make noodles according to package directions, drain
- Place noodles back into pot, add butter & stir to combine
- Add milk.  (You may need to add more or less depending on your desired consistency.)
- Add cheese & mix well.
- Add your spices according to your taste.  If spices aren’t your thing, just skip!


Mac+Cheese

On the Creek blog is proud to be a part of the T&J Maintenance family - turning houses into homes.